Main Work Flow -
Adjustment Curve and Transparency
Making photogravures with KM73 polymer plates takes a lot of practice. It requires physical skill that can only be learned with time, and through much trial and error. During the process of learning, i want to caution you against changing too many variables at a time. Consistency is key to finding a work flow that works.
Much has been written about making digital negatives (which can be used to create the positive transparencies for this technique), color profiles through the computer, inkjet printers, and paper. While all of that knowledge is helpful (and necessary), it only covers half of the skill base needed to make photogravures. Printing photos with this technique require just as much intaglio printmaking skill as digital photography knowlege and alternative/historical photography acumen. The alternative photography community is a tremendous resource, but consider that you must give equal time to learning from the intaglio printmaking community.
Color Settings
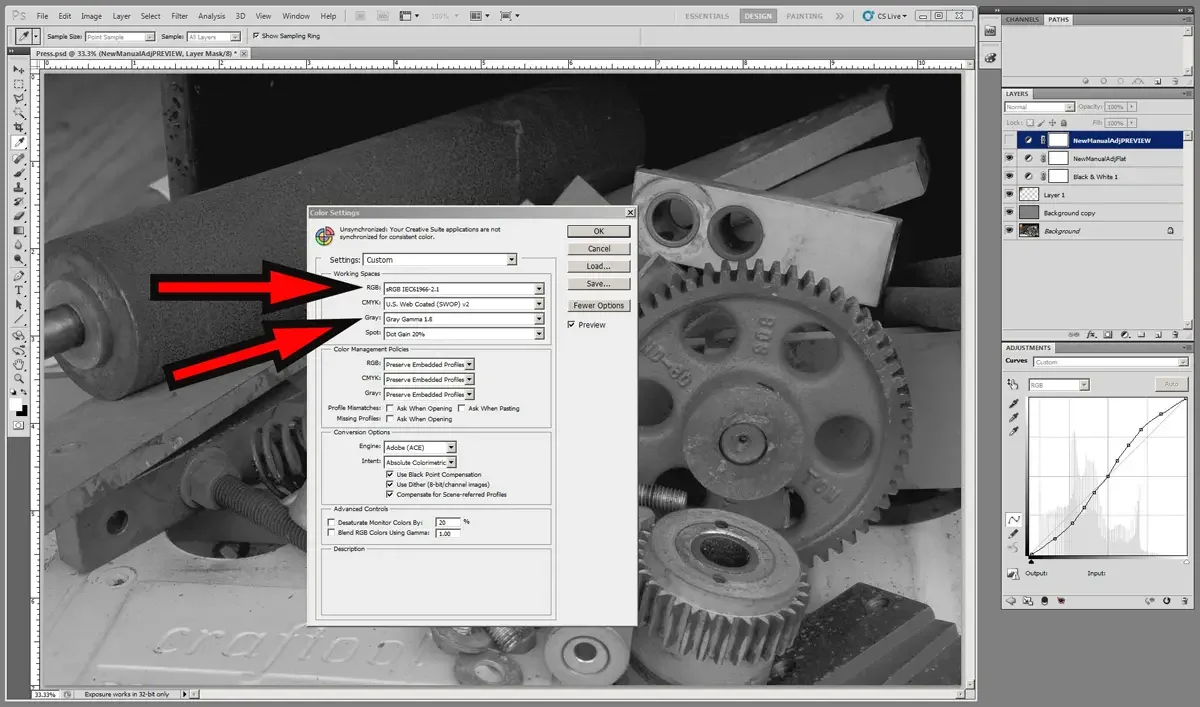
Before doing anything, check the color settings. Make sure to use the same color settings throughout the entire digital work flow. Just about any setting will work, as long as it stays the same through the entire work flow (and as long as it is compatible with the various devices used: camera, scanner, printer, operating system, digital editing software, etc.)
In Adobe Photoshop: Edit —> Color Settings
The two most important settings are RGB and GRAY.
In this example, RGB is set to sRGB IEC61966-2.1, which is an old standard, with a small enough gamut, that everey device can use. It is more than enough for this entire process. I like this one. It keeps things simple, and I have not noticed any significant difference, for this process, when using larger color spaces.
If you insist on using a larger color space, then I want to reinforce the first paragraph. Make sure your color management is consistent and stays the same throughout your process. If you start a process with one color space, then switch to a different color space in the middle of that process, you are introducing many potential problems.
Gray Gamma is an associated Tone Reproduction Curve for your color work space. Gray Gamma 1.8 is associated with ProPhoto RBG. Gray Gamma 2.2 is associated with sRGB and Adobe RBG. (Note the mismatch in the photo)
The Adjustment Curve
This adjustment curve will compensate for the difference between the physical reality of the varying densities of the printed transparency and the theoretical densities of the digital file. Unless you indicate otherwise, the digital file assumes that everything is a perfectly linear progression from light to dark. The adjustment curve corrects that assumption. The reality of inkjet transparency ink is certainly not linear (and varies from brand to brand). Exposure to UV lights is logarithmic. Application of ink will vary depending on the hand used to apply it, and multiple variables in the printing process. The adjustment curve is a correction for those variables.
The PC menu is different than the Mac menu. The images in this section show the PC menu for an Epson Stylus Pro Photo 3800 through Adobe Photoshop CS5.
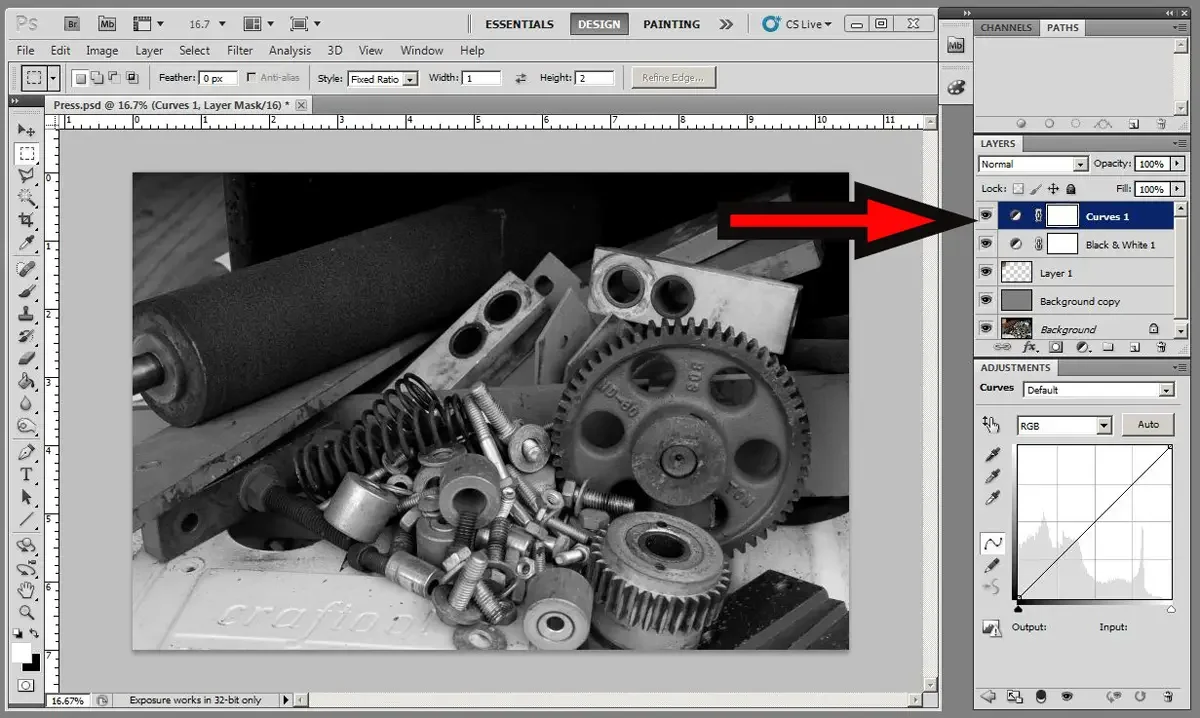
Use the menu at the top of the curve window to select the adjustment curve ou made in chapter, and make sure it is applied to your image.
If you have not yet made your own custom adjustment curve, you may try someone else’s curve (as a way to get started). Since everyone’s work flow is unique, be aware that a “canned” curve from someone else may not provide you with the best results.

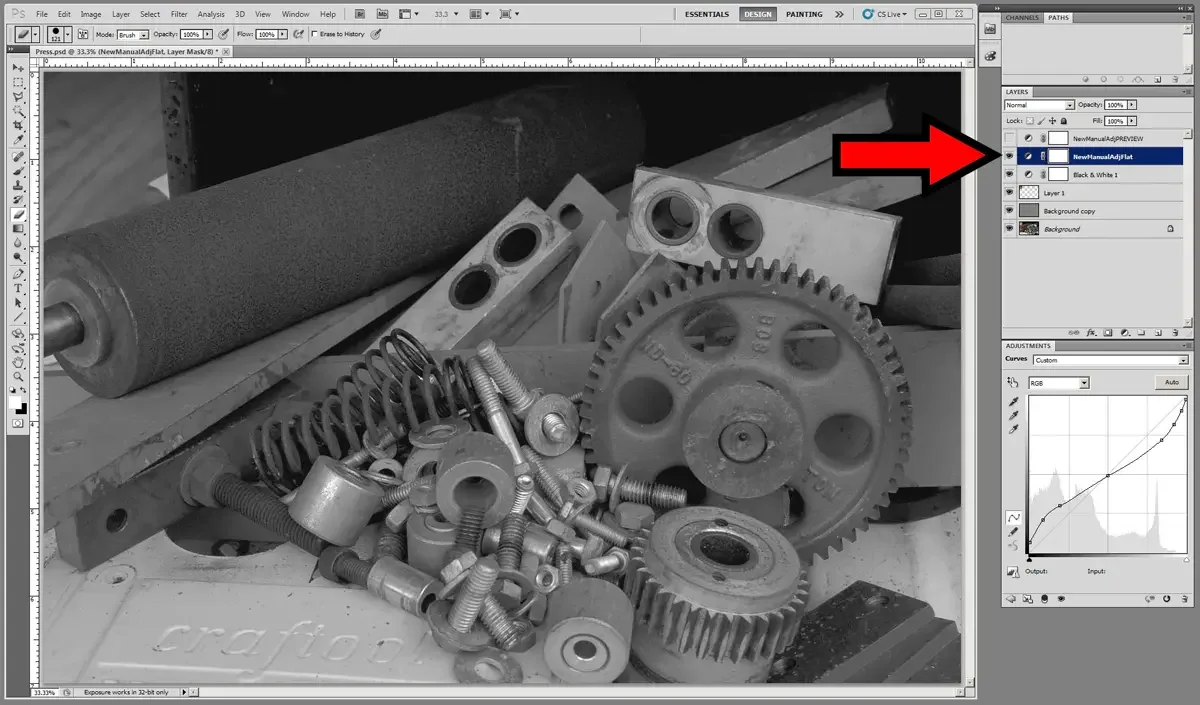
Make sure that the adjustment layer is turned on, and any preview layers are turned off.
Preview layers are not covered in this book. They can be used to soft proof your image, but only work if the process of building adjustment layers is accurate. A preview layer is only shown in htis image so that you are awre of their existence in some people’s work. As a soft proof layer, it should not be turned on when you are ready to print. The adjustment layer, however, does need to be turned on before printing.
Get in the habit of naming the adjustment layers. Having layers that are named “curve” and “curve-02” can get confusing.
The adjustment curve should be at the top of the layer stack. It should be turned on. It will affect everything below it in the layer stack. The image is going to look flat (significantly less contrast). Trust the process. This transparency is designed for UV light, not visible light.
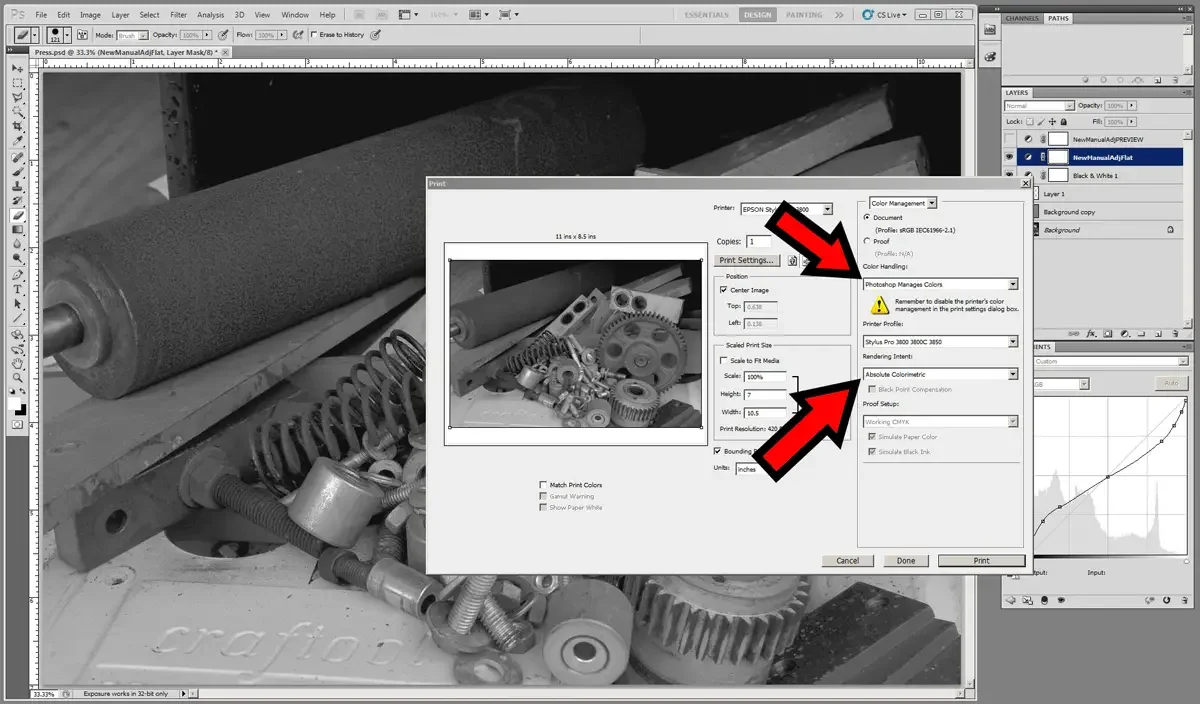
In the print menu, turn off al lcolor controls, allowing only Photoshop (or the other image editing software) to control the color. Make the rendering intent absolute colorimetric. This will make sure that out-of-gamut colors do not shift the res of the colors to create a relative gray scale. When printing a digital transparency, you want to have as much control as possible, dealing in absolute terms (predictably reproducable terms). Turn off black point compensation.
This menu must be checked every time you print. It is subject to change, and is not part of what gets saved when you save a print setting. Write the settings on paper to remembre them.
To find this in the Epson Stylus Pro Photo 3800 menu, in Adobe Photoshop CS5 for PC:
File —> Print
In the Print Settings sub-menu, make sure that color adjustment is turned off.
The Print Settings sub-menu is the menu that dictates what the printer will do. As the printer’s menu, you must turn off the color settings to allow Photoshop to control the color. Adjust paper size, source, and ink settings.
To find this with the Epson Stylus Pro Photo 3800 menu in Adobe Photoshop CS5 for PC:
File —> Print —> Print Settings
Check the Print Preview box to make sure it is on.

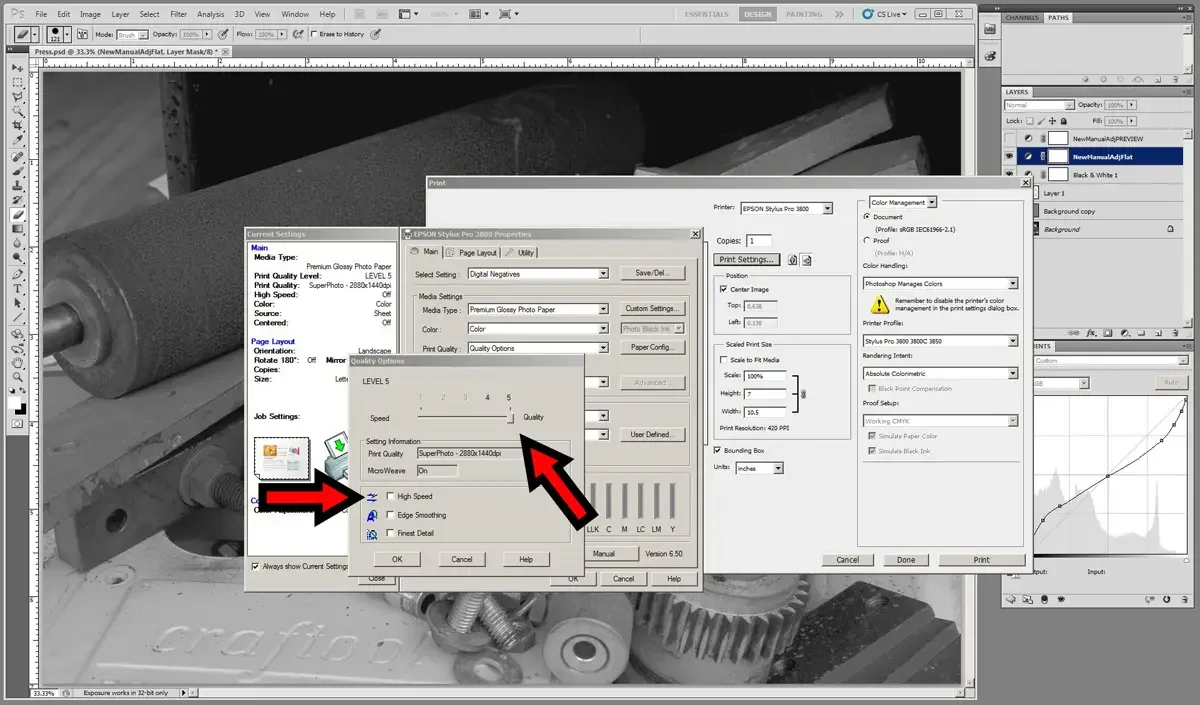
In the Paper Configuration menu, find the Quality Options to control the speed at which the printer will print. Turn off high speed printing, and make sure the resolution is as high as possible.
To find this on the Epson Stylus Pro 3800 menu in Adobe Photoshop CS5 for PC:
File —> Print —> Print Settings —> Print Quality (dropdown) —> Quality Options
move slider quality to 5 (quality)
Setting Information: SuperPhoto - 2880 × 1440 dpi
MicroWeave: On
High Speed: Off
Edge Smoothing: Off
Finest Detail: Off
Write everything down. If you have doubts about what is saved in a preset and what is not, check everything. Eventually, you will learn the idiosyncrasies of your printer driver.
Adjust the drying time per print head pass to slow down the rate of printing.
Slowing down the rate of printing will allow the ink enough time to dry before running under the guide wheels. An additional 0.3 seconds is adequate, but more will only provide additional time for the ink to dry. Not letting the ink dry between print head passes will create a situation in which the guide wheels can make marks on the wet ink.
To find this on the Epson Stylus Pro 3800 menu in Adobe Photoshop CS5 for PC:
File —> Print —> Print Settings —> Paper Config…
Color Density: +0
Drying Time per Print Head Pass: 3 (0.1 sec)
Paper Feed Adjustment: +0
Paper Thickness: 3 (0.1mm)
Platen Gap: Auto
Save this setting, giving a name that is easy to remember.
(My print profile is saved simply as “Digital Negatives” since I use it for other contact printing photographic processes). Saving the setting will minimize the step in the future and help maintain consistency in the work flow.

Press print.
If you have the Print Preview button selected, you will have time to take the transparency media out of its package and place it into the printer while the computer sends the job to the printer and shows the preview screen.

Printing The Transparency
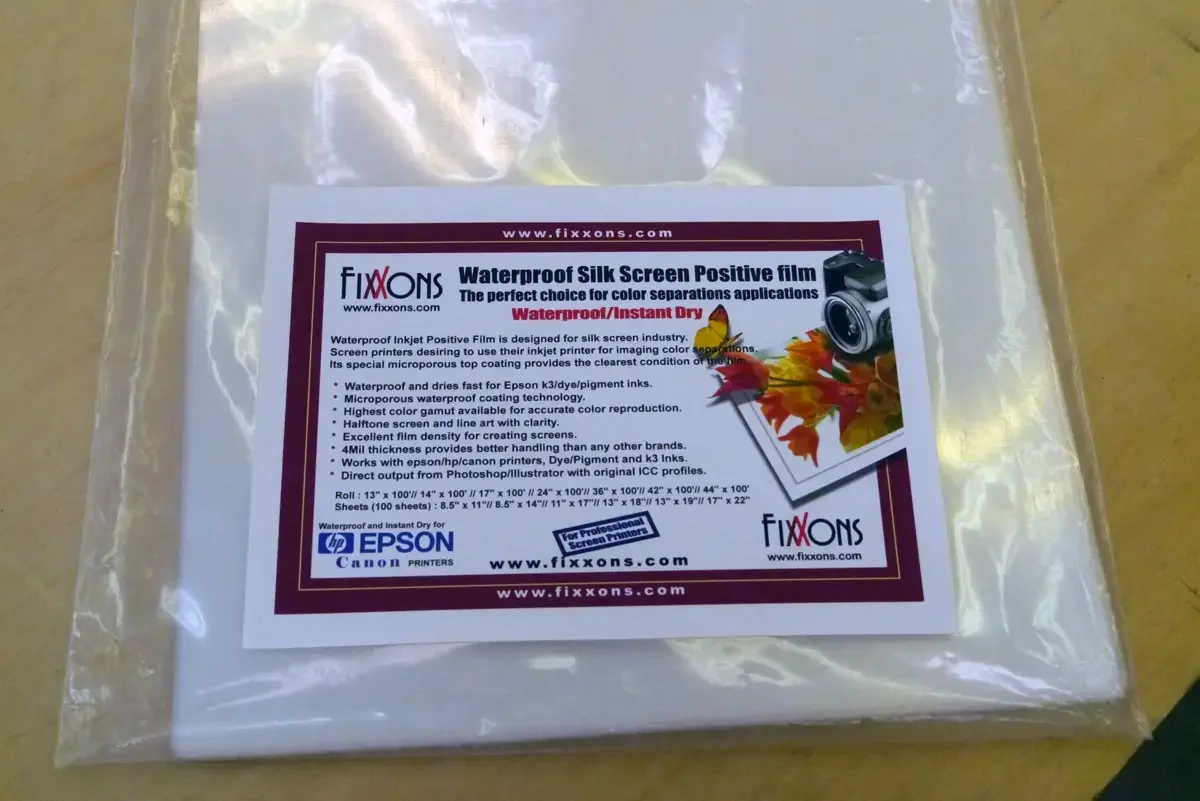
Remove the transparency medium from its package. Be careful to track which side is coated for printing.
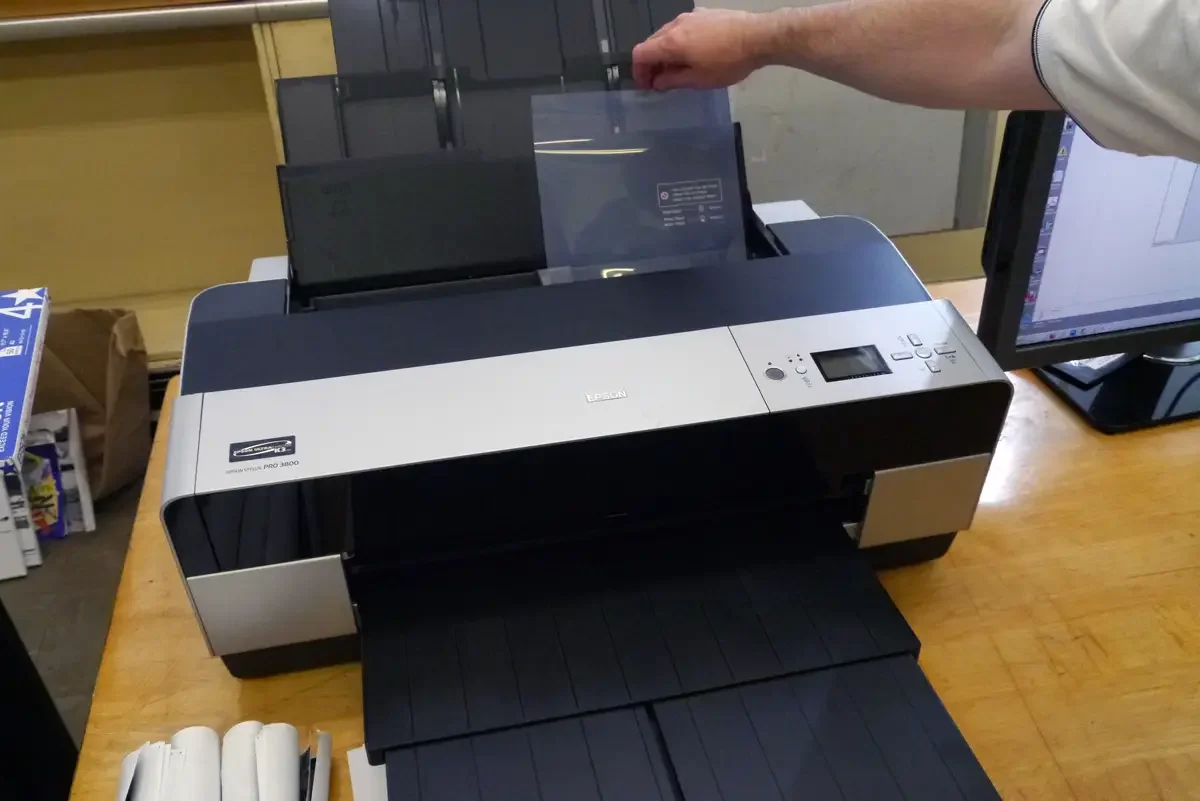
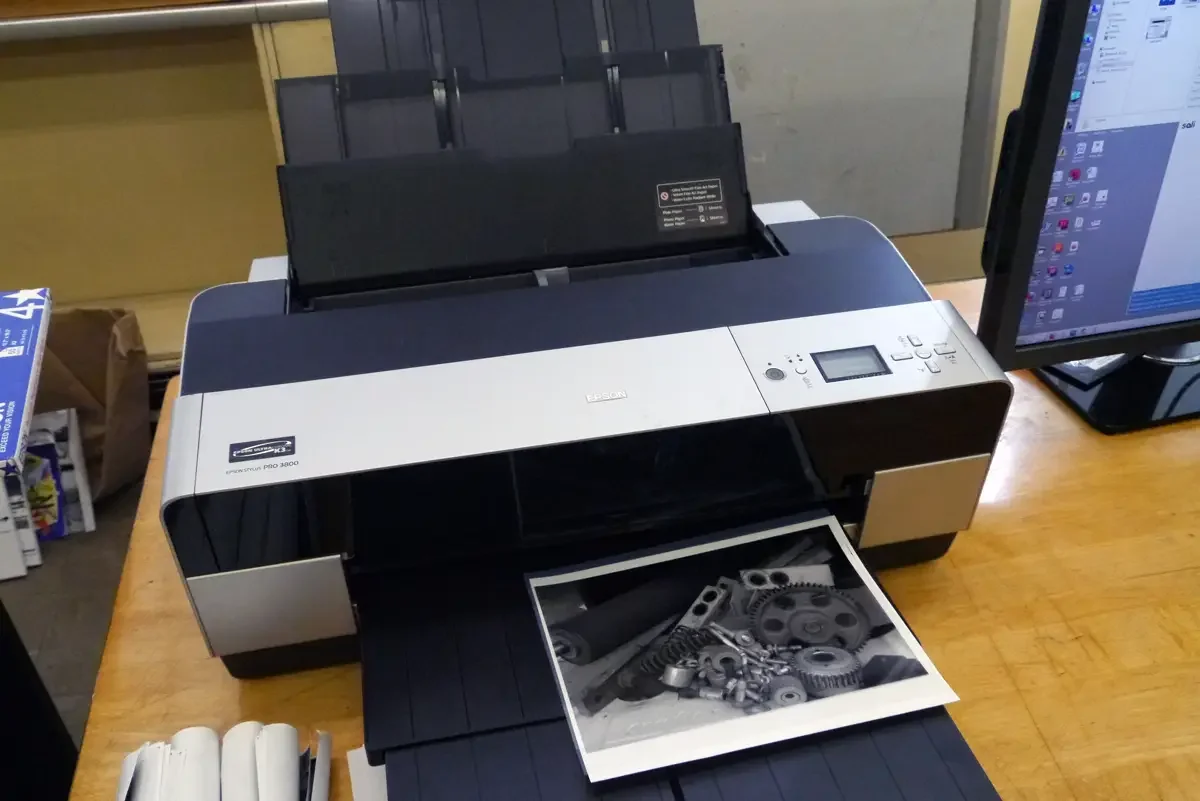
Place the transparency into the printer, with the appropriate side facing the print heads. In the Epson 3800, the printable side faces up.
Confirm the print preview by pressing Print, and let the machine print the transparency.
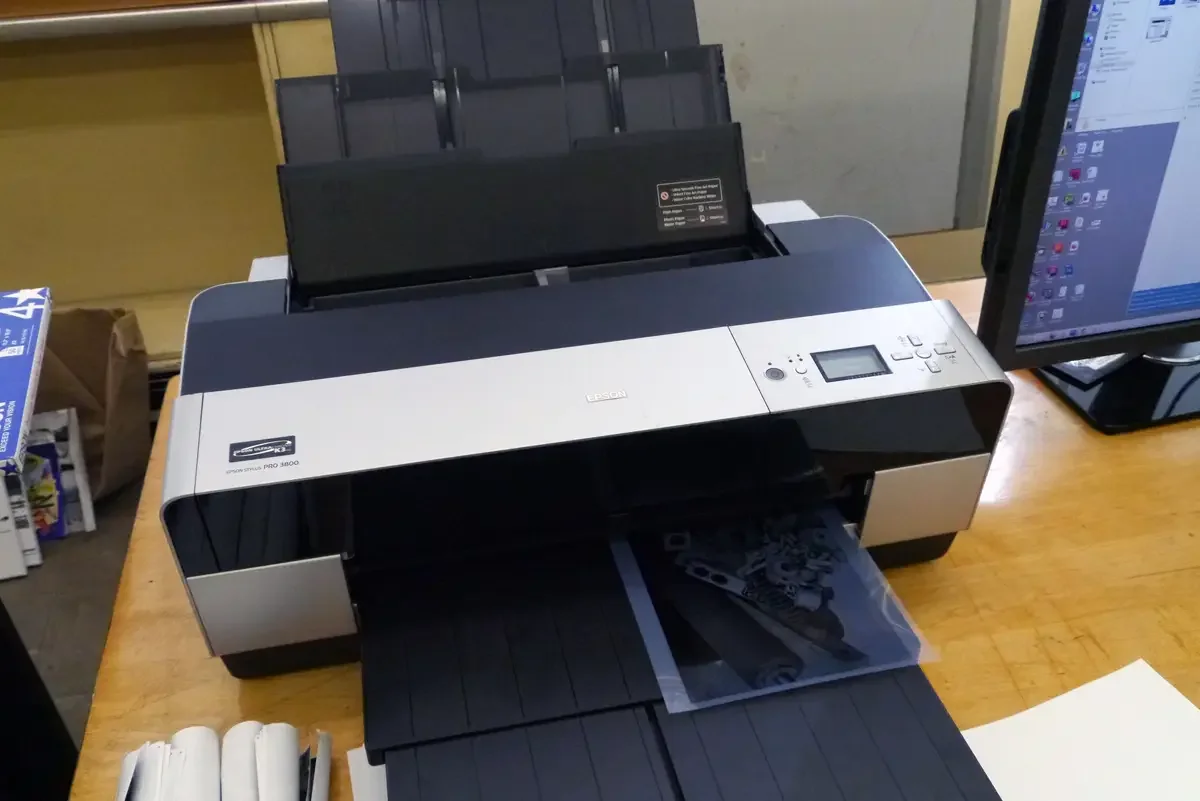
Place the new transparency on a clean piece of paper so dirt and other contaminants cannot touch the back of it. White paper will also let you inspect the transparency like banding, blurring, or guide wheel marks.
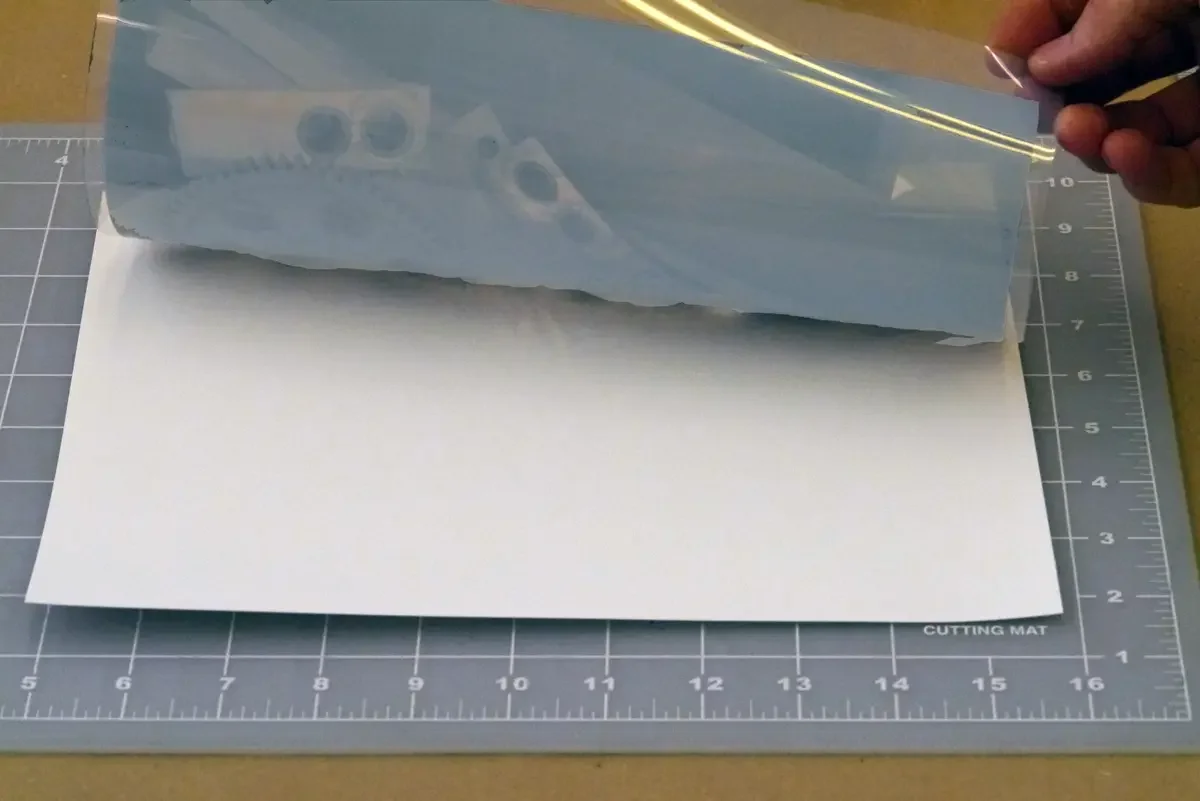
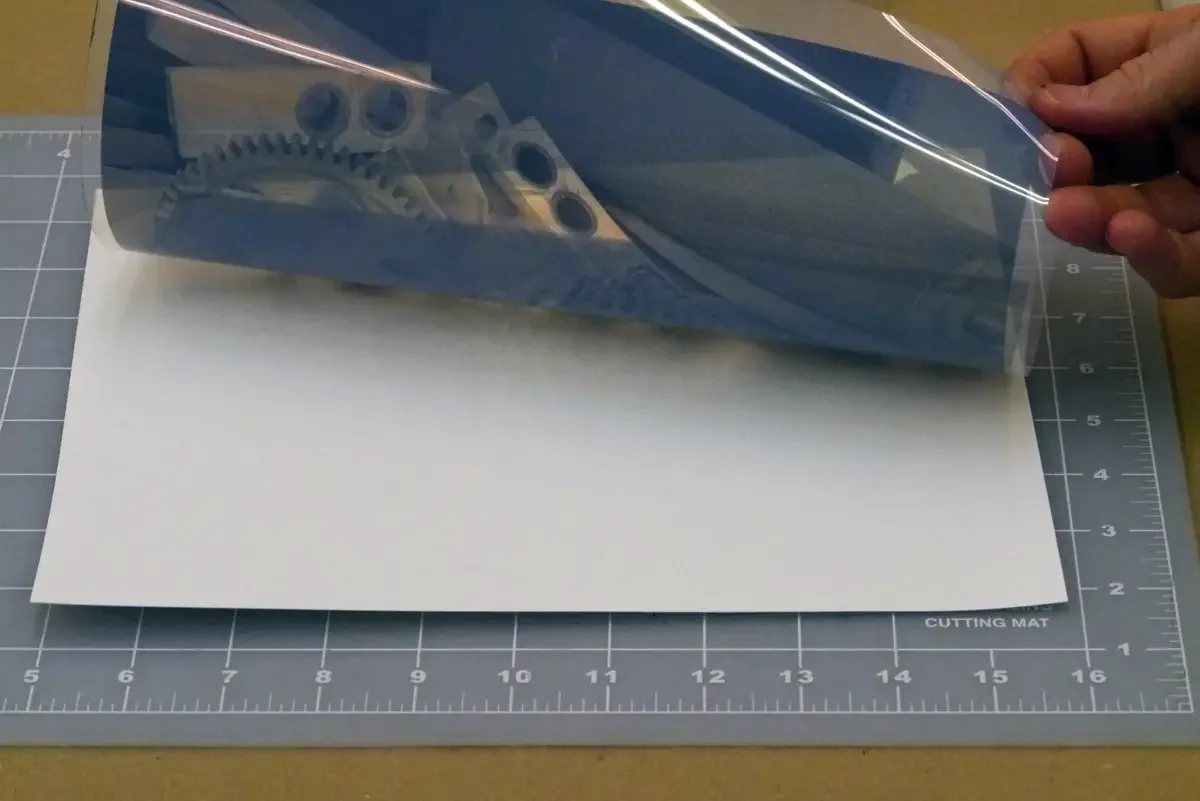
A wet transparency will be cloudy, when viewed from the back, and more clear when dry.
The initial cloudy appearance will typically disappear within 10 minutes. This means that the ink is dry enough for careful handling, but it is not yet completely dry.
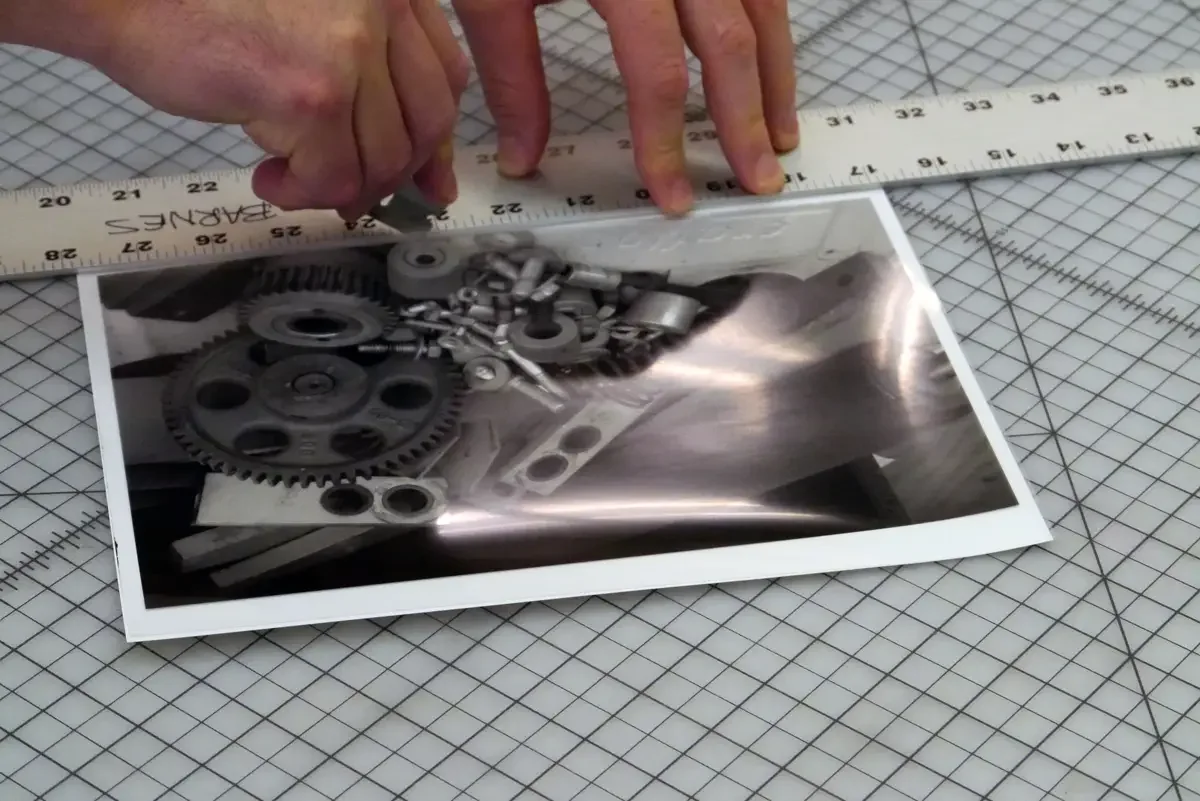
Trim the transparency to the correct size.
Cut edges will make faint lines in the final work. Either leave enough clear border or trim the transparency to the edge of the image.
Be very careful. Inkjet transparencies are not as tough as film negatives. Wet ink will smudge easily. Dry ink scratches easily.
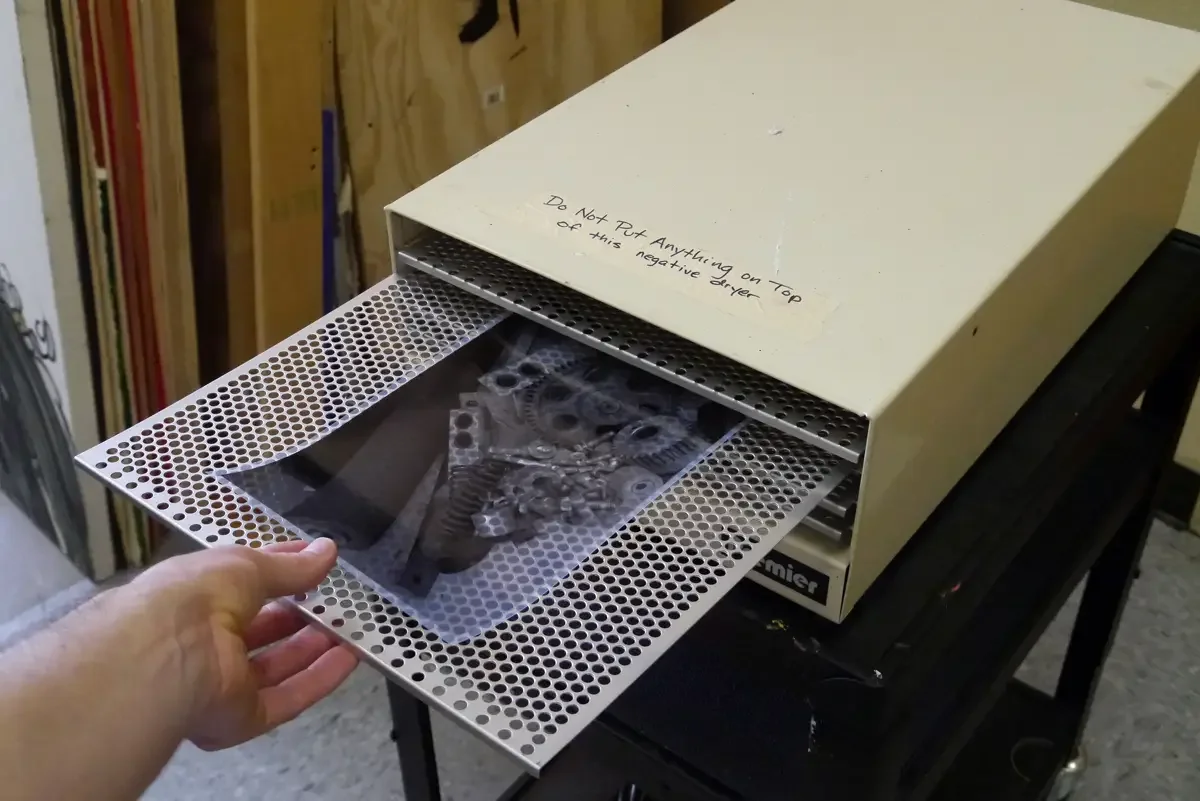
Place the transparency in a print dryer for an hour.
If you do not have a print dryer, then you must let the transparency dry for 12 hours to make sure it is completely dry. The process can be sped up with a hair dryer on a low setting. Be careful not to use a hair dryer within the first 15 minutes after the transparency is printed.
Frequently Asked Questions
Why does photogravure require a custom adjustment curve?
The digital file assumes a perfectly linear tonal response. The physical process — inkjet transparency, UV exposure, polymer washout, ink, and paper — does not behave linearly. The adjustment curve compensates for the cumulative tonal shift introduced by all of those variables, so that the final print more closely matches the original digital image.
What color space should I use for photogravure transparencies?
sRGB IEC61966-2.1 works reliably and is compatible with virtually every device in the workflow. Larger color spaces are not necessary. The most important rule is consistency: whatever color space you begin with, maintain it throughout the entire workflow from camera or scanner through to the final print setting.
Why must color management be turned off in the printer driver?
When printing a photogravure transparency, Photoshop must have complete control over color. If the printer driver also applies color corrections, the two systems conflict and produce unpredictable results. Turn off all color adjustments in the printer settings and set the rendering intent to absolute colorimetric in Photoshop.
What is Fixxons transparency film and why is it used?
Fixxons is a waterproof inkjet transparency film designed for screen printing applications. It accepts inkjet ink without smearing and dries to a stable, printable surface. It is widely used in alternative photographic processes because it produces dense, consistent inkjet output suitable for UV contact printing.
Why does a wet transparency look cloudy?
The cloudiness is caused by moisture in the ink layer immediately after printing. It typically clears within ten minutes as the ink dries. The transparency should not be used for plate exposure until it is completely dry. A print dryer accelerates this process. Using a transparency before it is fully dry risks ink smearing during contact with the polymer plate.